 how-to
How to Inspect Used Golf Carts for Rust
Table of Contents
- Why Rust Inspection Matters When Buying a Used Golf Cart
- Tools You'll Need for a Complete Rust Inspection
- Step 1: Examine the Frame and Chassis for Corrosion
- Step 2: Inspect the Battery Tray and Electrical Components
- Step 3: Check Suspension, Leaf Springs, and Undercarriage
- Step 4: Test Brakes, Lights, and Electrical Systems
- Used Golf Cart Inspection Checklist
- How to Remove Rust from Golf Cart Chassis
- Frequently Asked Questions
Last Updated: September 30, 2026
Why Rust Inspection Matters When Buying a Used Golf Cart
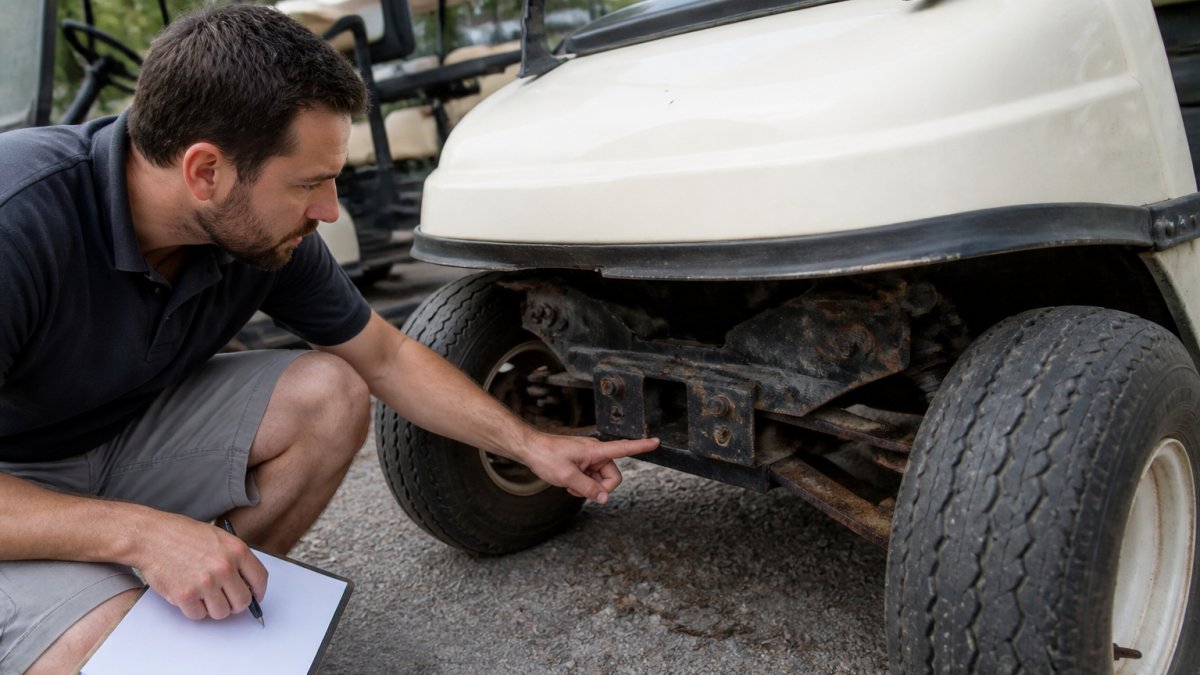
Rust is the silent killer of used golf carts. A cart with surface rust on the frame might look fine from ten feet away. But structural corrosion underneath can cost you thousands in repairs, or render the cart unsafe to drive.
When you're shopping for a used cart, knowing how to inspect used golf carts for rust separates smart buyers from those who get stuck with expensive problems. A cart that looks clean on the outside might be rotting from the inside. This is why learning how to inspect used golf carts for rust is non-negotiable before you hand over cash.
When shopping for a used golf cart, understanding the difference between surface rust and structural rot is crucial. Here's what you need to know.
Tools You'll Need for a Complete Rust Inspection
You don't need expensive equipment to spot rust problems. A few basic tools reveal what's really happening under the surface.
Essential inspection tools:
- Wire brush or stainless steel brush (removes surface rust to see what's underneath)
- Flashlight or headlamp (reveals hidden corrosion in dark areas)
- Screwdriver (pokes soft spots in metal to test structural integrity)
- Magnet (identifies steel vs. aluminum frames)
- Measuring tape (tracks rust spot size)
- Work gloves (protects hands from sharp rust edges)
- Moisture meter (detects water damage inside battery tray)
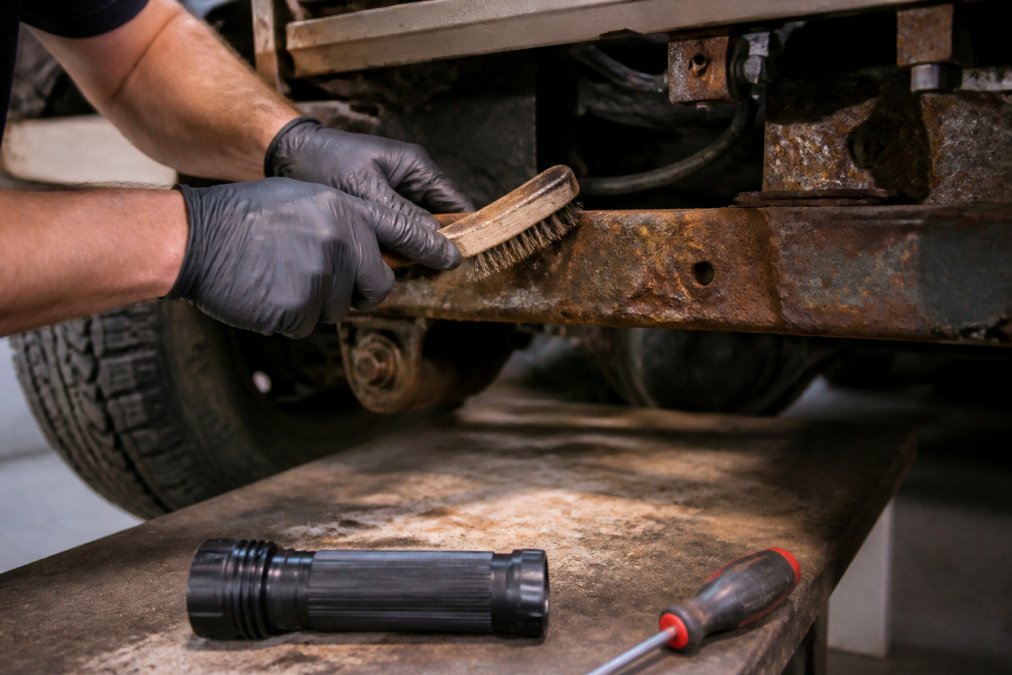
A wire brush is your most important tool. It lets you scrape away surface rust and see if the metal underneath is solid or pitted. If the metal crumbles when you brush it, you've found structural rot.
Keep the flashlight handy. Rust hides in shadows, under the frame, inside wheel wells, and along suspension mounts. You can't spot what you can't see.
Step 1: Examine the Frame and Chassis for Corrosion
Start your inspection at the frame. The frame is the skeleton of the cart. If it's compromised, nothing else matters.
Look for orange, brown, or reddish discoloration on the metal. That's rust. Run your hand along the frame rails. Feel for rough, pitted texture. Smooth metal is good. Rough, flaky metal is bad.
Use your wire brush on suspect areas. Brush firmly. If the rust flakes away easily and you see solid metal underneath, that's surface rust. If you brush and find soft, crumbly metal, that's structural corrosion. Stop there, this cart has serious problems.
Check the frame at these critical points:
- Where the frame connects to the chassis
- Along the bottom rails (closest to the ground)
- At suspension mount points
- Under the battery compartment
- Where the frame meets the body panels
Pay special attention to areas where water collects. Low spots on the frame rust first because water sits there longer.
Identifying Steel vs. Aluminum Frames
Not all frames are the same. Steel frames rust. Aluminum frames oxidize differently, they form a white or gray powdery coating instead of orange rust.
Use your magnet to tell them apart. A magnet sticks to steel. It won't stick to aluminum. If the magnet pulls strongly, you have a steel frame. If it doesn't stick at all, it's aluminum.
Steel frames are cheaper but rust faster. Aluminum frames resist corrosion better but cost more. Neither is inherently bad, but you need to know what you're buying.
Aluminum oxidation looks scary but is usually just surface-level. The white or gray powder is aluminum oxide. It doesn't eat through the metal like rust does. You can clean it off and the frame underneath is usually solid.
Surface Rust vs. Structural Rot
This distinction changes everything about your buying decision.
Surface rust sits only on the outer layer of metal. It looks bad but doesn't compromise strength. A wire brush removes it. The metal underneath is hard and solid. Surface rust costs money to fix but the cart is still safe.
Structural rot eats through the metal. It creates pits, holes, and soft spots. When you poke it with a screwdriver, the metal gives way. This means the frame has lost integrity. A structurally rotted frame cannot be safely repaired. The cart is essentially worthless.
Test with your screwdriver. Press the tip firmly into rusty areas. If the tip doesn't penetrate, the metal is solid. If the tip sinks in easily, you've found structural rot. Walk away.
Step 2: Inspect the Battery Tray and Electrical Components
Golf cart batteries sit in a tray underneath the cart. This is where rust and corrosion cause the most expensive damage.
Water and salt spray get trapped in the battery tray. Batteries leak acid. These combine to create a perfect storm for corrosion. Battery terminal corrosion is one of the most common problems in used carts.
Look at the battery terminals. They should be shiny or silver. If they're covered in white, blue, or green crusty buildup, that's corrosion.
Red flags in the battery area:
- Heavy white or green buildup on terminals
- Cracked or leaking batteries
- Rust holes in the battery tray
- Loose or corroded cable connections
- Water pooling in the tray
- Burnt or melted plastic on battery covers
Step 3: Check Suspension, Leaf Springs, and Undercarriage
The suspension system keeps the cart stable and comfortable. Rust on leaf springs and suspension mounts weakens the entire system.
Look for:
- Pitting or holes in leaf springs
- Rust at suspension mount points
- Corroded bolts (they should turn easily with a wrench)
- Flaking metal on shock absorbers
- Water damage or mud buildup
Step 4: Test Brakes, Lights, and Electrical Systems
Rust doesn't just affect the frame, it kills electrical systems. Corroded wires and connections cause electrical shorts and brake failure.
Electrical red flags:
- Lights that flicker or won't turn on
- Brake failure or soft brakes
- Steering that feels heavy or unresponsive
- Corrosion on any visible wiring
- Burnt smells when the cart runs
- Difficulty starting the engine
Used Golf Cart Inspection Checklist
Use this checklist during your inspection. Check off each item as you go.
| Inspection Area | What to Look For | Status |
|---|---|---|
| Frame and Chassis | Solid metal, no pitting or holes | ✓ |
| Steel vs. Aluminum | Magnet test confirms material type | ✓ |
| Surface Rust | Wire brush removes easily | ✓ |
| Structural Rot | No soft spots when tested with screwdriver | ✓ |
| Battery Tray | No rust, water, or corrosion | ✓ |
| Battery Terminals | Clean and shiny, no white buildup | ✓ |
| Cables and Wiring | Intact and corrosion-free | ✓ |
| Leaf Springs | Straight and solid, no pitting | ✓ |
| Suspension Mounts | Bolts tight, no corrosion | ✓ |
| Undercarriage | Clean and dry, no rust or water | ✓ |
| Brakes | Stop smoothly, no grinding | ✓ |
| Lights | All work: headlights, turn signals, brake lights | ✓ |
| Electrical System | No burnt smells, horn works | ✓ |
How to Remove Rust from Golf Cart Chassis
If you find surface rust, it can be cleaned. Structural rust cannot be fixed, the cart must be replaced or scrapped.
For surface rust, follow these steps:
Frequently Asked Questions
What are the most common areas for rust on a used golf cart?
Battery trays, chassis undersides, leaf spring mounts, and brake cable housings rust first due to moisture exposure and salt air. The frame near suspension points and around wheel wells also corrode quickly. Inspect these zones closely during your used golf cart inspection, structural rust in these areas indicates the cart has been exposed to harsh conditions or poor maintenance.
How can you tell the difference between surface rust and structural corrosion?
Surface rust appears as a thin orange or brown layer on the metal and can be scraped away with a wire brush, leaving solid metal underneath. Structural corrosion creates pitting, flaking, or holes in the frame, and the metal crumbles or feels soft when probed. Use a screwdriver or awl to test suspect areas, structural damage will show deep pitting or breakthrough holes, while surface rust stays on top.
Is it safe to buy a golf cart with minor frame rust?
Minor surface rust on the frame is cosmetic and can be remedied with wire brushing, rust converter, and repainting. However, rust near suspension mounts, leaf springs, or battery trays signals potential structural issues. If corrosion has penetrated the frame or weakened bolt mounts, the cart's safety and longevity are at risk. Have a professional assess deep corrosion before purchase.
What tools do I need to inspect a used golf cart for rust?
Bring a wire brush, screwdriver or awl, flashlight, socket wrench set, tire pressure gauge, and a multimeter for electrical testing. A creeper or jack helps you access the undercarriage safely. Wear gloves and eye protection when probing corroded areas. These tools let you examine the chassis, test battery terminals, check suspension bolts, and verify brake function without professional equipment.
Rust inspection takes time, but it's the smartest investment you can make before buying a used golf cart. A thorough inspection catches problems early and saves you thousands. If you're unsure about what you find, bring the cart to a professional for a second opinion. At Amplify Your Ride, we're happy to evaluate any used cart you're considering. We'll tell you exactly what you're looking at, the good, the bad, and the expensive. Get a professional inspection and buy with confidence.